
Every modern application depends on Application Programming Interfaces (APIs) to exchange data, integrate with external services, and deliver seamless user experiences. Because APIs act as a communication layer between systems, even small failures—like incorrect response codes, data inconsistencies, or latency—can break entire workflows.
This makes API testing one of the most critical stages of software quality assurance. Unlike UI testing, which validates the visible interface, API testing focuses on verifying the endpoints, request/response structure, status codes, authentication, and performance of APIs.
Among many API testing tools, Postman has become the industry standard due to its ability to handle everything from basic HTTP requests to complex automated testing workflows. Whether you want to validate functional correctness, simulate load, or integrate testing into a CI/CD pipeline, Postman provides an end-to-end platform.
What is Postman?
Postman is a comprehensive API client, testing tool, and development platform. Originally created to simplify sending HTTP requests, it has evolved into a robust environment for:
- Designing APIs with support for schema definitions and contract validation.
- Sending requests (GET, POST, PUT, DELETE, PATCH, etc.) with detailed control over headers, authentication, and request body.
- Automating tests with JavaScript-based scripting for assertions and response validation.
- Mocking APIs with simulated endpoints to test integrations before the backend is ready.
- Monitoring performance with scheduled test runs against peak traffic and SLA thresholds.
- Enabling collaboration by organizing APIs into collections, environments, and version-controlled workspaces.
What makes Postman Useful?
Many QA teams use tools like REST Assured, JMeter, or SoapUI for API testing. While these tools are powerful, Postman brings together features that cover both developer workflows and QA automation needs:
1. GUI + Code Flexibility
- Beginners can use its UI to build and send requests without writing code.
- Advanced users can write test scripts for functional testing, contract testing, and performance validation.
2. Realistic API Simulation
- Built-in mock servers allow you to create mock data and test client applications even before the actual API is available.
- This reduces dependency delays in integration testing.
3. Automation & CI/CD Integration
- Tests can run through Newman, Postman’s command-line tool, in CI/CD pipelines (Jenkins, GitHub Actions, GitLab CI).
- Supports continuous integration and early issue detection.
4. Monitoring & Reporting
- Postman Monitors provide scheduled execution of test suites, tracking metrics like response times, status codes, and throughput.
- Ensures API performance remains consistent under different conditions.
5. Collaboration & Governance
- APIs can be grouped into collections, shared across teams, and tied to version control.
- Useful for ensuring consistent coverage and avoiding human errors in large teams.
Read also: What is API Testing in Software Testing?
How to Test APIs with Postman?
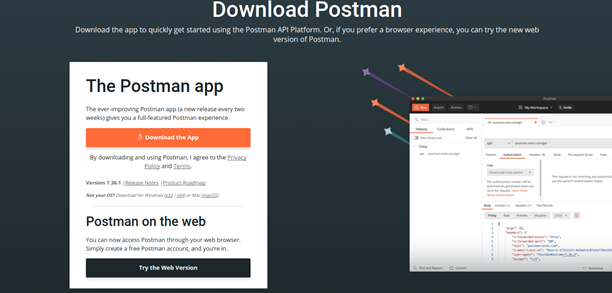
Postman is accessible for almost any development setup because it is free and compatible with Windows, macOS, and Linux. You can either use its browser-based version without installation or download it directly from the official Postman website.
For those who prefer not to install software, Postman also offers a web version. Simply sign up or log in with your existing account to start testing APIs directly in your browser.
If you choose the desktop application, installation is straightforward:
- Download the installer for your operating system.
- Run the installer (double-click on the file).
- Once installed, launch Postman and log in with your account. If you don’t have one, you can create it during setup.
After login, you’ll be prompted to set up your preferences, workspace, and environment. Once configured, you’ll land on the Postman start page, ready to begin creating and running API requests.
Step 1: Create a Collection and Organize Requests
A Postman Collection is a container that groups multiple API requests together.
- This ensures better organization when dealing with multiple endpoints across different services.
- Collections can also be version-controlled and shared across teams, ensuring consistent coverage.
Example:
Create a collection named “User Management APIs” and add requests like:
- POST /users/register
- POST /users/login
- GET /users/{id}
- PATCH/users/{id}
- DELETE /users/{id}
This grouping allows you to run integration testing across related APIs in a structured workflow.
Step 2: Add a Request
Each API call in Postman starts with defining a request:
- Endpoint URL → Example: https://api.example.com/users/login
- HTTP Method → Choose based on API design:
- GET → Retrieve resources
- POST → Create resources
- PUT/PATCH → Update resources
- DELETE → Remove resources
- Authentication → Configure Basic Auth, Bearer Tokens, or OAuth credentials.
- Request Body → For POST and PUT, specify JSON, XML, or form-data.
Example: Testing a login endpoint with JSON body
{
“username”: “testuser”,
“password”: “Password123”
}
Step 3: Send the Request and Inspect the Response
After clicking Send, Postman provides a detailed response view. Key elements to validate:
- Status Codes → Confirm correct behavior:
- 200 OK → Request successful
- 400 Bad Request → Invalid input
- 401 Unauthorized → Missing/invalid authentication
- 500 Internal Server Error → API/server issue
- Response Body → Verify data structure, field values, and response schema.
- Headers → Check Content-Type, Cache-Control, CORS headers, etc.
- Performance Metrics → Response time and size, critical for load testing and monitoring API performance.
Step 4: Write Automated Test Scripts
For basic requests, manual validation is sufficient; however, thorough QA requires automated testing. Postman enables automated validation of responses, status codes, and performance metrics by allowing you to create JavaScript-based test scripts that run automatically after each request.
Example Script – Validate Status and Response
// Verify status code
pm.test(“Status code is 200”, function () {
pm.response.to.have.status(200);
});
// Validate response contains expected field
pm.test(“Response has access token”, function () {
let jsonData = pm.response.json();
pm.expect(jsonData).to.have.property(“token”);
});
// Ensure response time < 500ms
pm.test(“Response time is under threshold”, function () {
pm.expect(pm.response.responseTime).to.be.below(500);
});
These automated test cases ensure that every execution checks:
- Functional correctness (status codes, data fields)
- Performance benchmarks (response time)
- Security requirements (auth tokens, error handling)
This reduces human errors and guarantees thorough testing.
Step 5: Run Tests at Scale
Once test scripts are in place, Postman provides multiple execution modes to scale testing:
1. Collection Runner
- Runs all requests in a collection, sequentially or with input data from CSV/JSON.
- Example: Run POST /login with multiple user credentials for data-driven testing.
2. Environment Variables
- Global Variables: Accessible across all collections, environments, and requests within a workspace. These are ideal for values that rarely change, such as api_key or base_url.
- Local Variables: Exist only within the scope of a single request or collection run. They are best suited for temporary or dynamic values, such as session tokens, that don’t need to persist.
3. Postman Monitors
- Schedule automated runs to monitor API performance continuously.
- Useful for service-level agreements (SLAs) and early issue detection under peak traffic.
Step 4. Newman CLI/HTLM Reports:
You can run the postman collection through Newman and its supports generating reports in formats like CLI, HTML and XML. etc making it easier to integrate with CI/CD tools such as Jenkins or reporting frameworks like Allure.
To Run Postman collections directly through Newman you needs some prerequisites
1.Need to installed the npm
Make sure npm is installed on your system. Command: npm install
2. Newman Installed
Install Newman globally using: npm install -g newman
3.Reporter installed
npm install -g newman-reporter-htmlextra
4. Generate CLI/HTLM Report
Run the API collection and generate CLI report with: newman run collection/api_test_collection.json –reporters “cli,htmlextra”
Step 5. Integrates seamlessly with CI/CD pipelines (Jenkins, GitHub Actions, GitLab).
Step 6. Enables continuous integration testing for every code commit.
Step 7: Analyze and Report Test Results
After execution, Postman provides detailed reports including:
- Pass/fail status for each test case.
- Response times across multiple requests.
- Logs for debugging failed API calls.
- Exportable results for audits or integration with external dashboards.
This ensures teams can track API quality over time, detect regressions, and guarantee reliable data exchanges.
Final Thoughts
In modern software delivery, where APIs act as the backbone of data exchanges and client-server communication, ensuring API quality is critical. Postman offers a complete solution — from manual validation of endpoints to automated test suites for contract testing, load testing, and integration testing.
By combining ease of use with enterprise-level features like monitoring, mocking, and CI/CD integration, Postman has established itself as the leading API testing tool. For QA teams and developers, adopting Postman means faster test cycles, reliable coverage, and reduced risk of production failures.
At Testrig Technologies, we specialize in building robust API automation frameworks using Postman and other advanced tools. Our API automation testing services focus on ensuring


